
One of the fun parts of being a DT member was coming up with tutorials. This tutorial I completed in May (2011) and thought I’d also repost here to share....
These flowers are so easy to put together and can be a lovely accent adhered to cards or layouts.
Requirements: Circle punch (or cut out circles by hand), ribbon, and a hot glue gun.
· Firstly, punch out several circles from cardstock. *See photo A. This is your base that holds the ribbons together, so it needs to be out of strong cardboard or cardstock, not just paper.

With your hot-glue gun, place a small amount of glue on cardstock circle and adhere ribbon. *See photo B.

Pleat your ribbon, carefully adding just a touch of glue with each pleat to hold in place, till whole circle is covered. *See Photo C & D.


Create a ribbon rose from the same ribbon. You can find plenty of instructions for these rolled ribbon roses, doing a google search. *See Photo D.
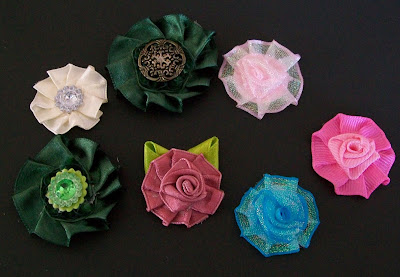
OR - add a button, or flower centre instead. *See Main Photo of Flowers for ideas.
Adhere your ribbon rose to the newly created ribbon circle. *See Photo E.

Using green remnant of ribbon, approx 4-5cm, fold ribbon to form a leaf. Create two leaves for each flower you make. See Photo F & G.


Attach leaves to bottom of circle with a small amount of glue. *See Photo F (below) for placement idea of leaves and finished flower.

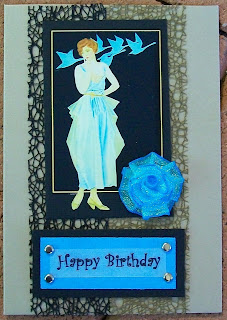
I quiet often use these flowers on cards, as they do sit quite nicely. Also, making your own flowers gives you the scope to match colours perfectly with other accents you use on layouts or cards. The below photographs are several examples of cards I have created, using the tutorial above to create flowers.
At the moment, my favorite ribbon to use on cards, allowing for both the more modern look as well as vintage is the “Mesh Ribbon” – it is so versatile.


No comments:
Post a Comment